ReStory: Chill Electronics Repairs First Days in Your Tokyo Shop
Survive the tutorial, fix your first Atari job, and learn the repair bench
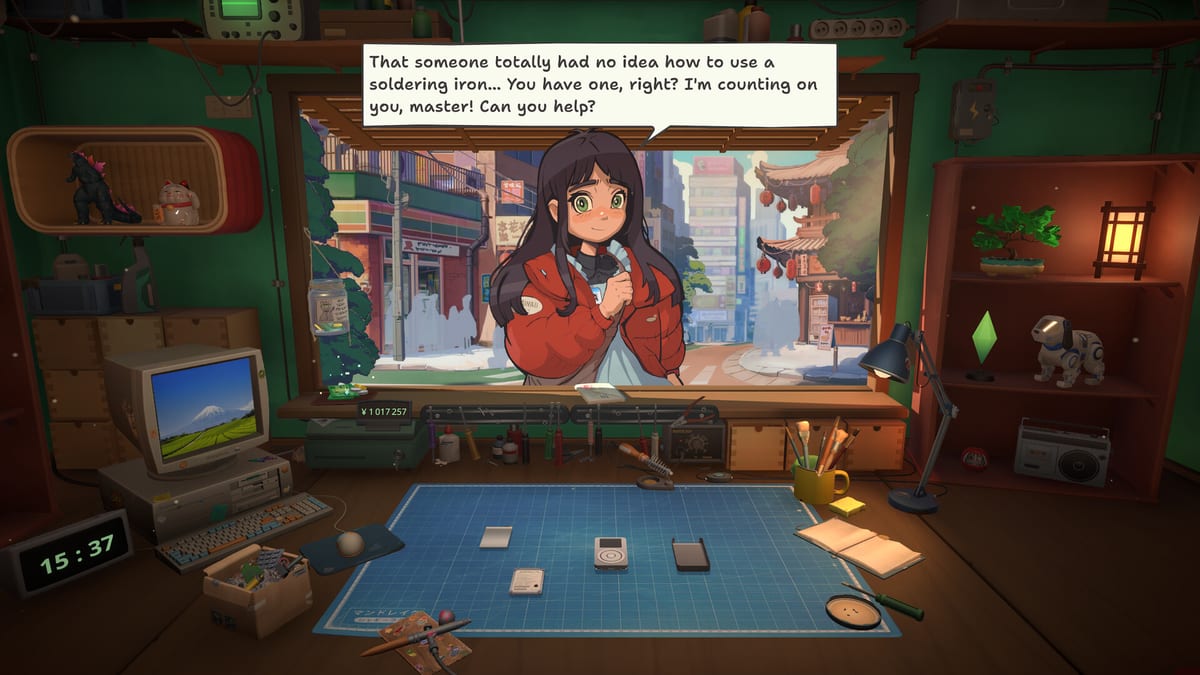
Your first days in ReStory: Chill Electronics Repairs set the rhythm for everything that follows. Mandragora front-loads teaching inside real customer stories, so the opening hours feel like a cozy shift rather than a slideshow. This page walks through that opening arc: accepting the shop, meeting early regulars, completing your first licensed Atari repair, and learning when to open the parts browser instead of guessing.
If you prefer to watch before you play, the walkthrough video above covers the Steam Next Fest demo from shutter-up through the first Nony PMP license tease. Use this text guide alongside it for checklist-style milestones you can pause on.
Before you take the first order
Launch day assumes you are playing after the full release on August 6, 2026, but demo veterans can skip repeated tooltips by mashing through only the new full-game prompts. Either way, open How to Play in another tab if button prompts confuse you—ReStory maps disassembly, cleaning, and reassembly across separate modes tied to the same workbench.
Check your starting inventory: basic screwdrivers, a cloth, and space for one active device. The shop UI shows pending customers on the left and your bench in the center. Story characters such as Haruhi and Sakamoto appear with portrait dialogue before they hand over hardware.
Day 1: Atari CX40 and the Pac-Man regular
The earliest mandatory job many players see is an Atari CX40 joystick tied to a customer chasing a Pac-Man high score on an Atari 2600. This is ReStory’s licensed Atari content in action—the logo and shell shapes are authentic, not parody.
Work through the repair in this order:
- Intake — Note the complaint (stick drift, dead directions, or loose housing). Start diagnosis from the outside before you remove screws.
- Disassembly — Follow highlighted fasteners; the CX40 uses classic Phillips heads. Place screws in the tray so the game can track them.
- Inspect — Look for cracked flex circuits, worn rubber boots, or a failed microswitch. The demo often flags a speaker or stick module—your spare shelf may already include a matching part.
- Clean — Wipe contact surfaces even if you replace parts. Mid-2000s shop fantasy or not, the game rewards spotless boards.
- Reassemble and test — Run the built-in test minigame if offered. Hand the stick back to unlock the next story beat.
This job teaches that not every broken component is the obvious one. Players frequently discover a working stick assembly but a dead speaker module. Always compare diagnosis icons to what you actually removed.
First cash, first browser session
After the CX40, the game nudges you toward the parts browser—a Y2K-styled web shop for spares. Early URLs behave like bookmarked suppliers rather than open Google search. Buy only what the active job needs until you have about one extra day’s float; over-ordering capsizes a fresh save.
Practice the loop documented in How to Get Spare Parts:
- Finish diagnosis before checkout.
- Compare unit price plus shipping—some listings hide fees.
- Keep one universal consumable (contact cleaner, generic screws) if the tutorial sells it.
Your first profits come from small flips: a Walkie-talkie with a blown fuse or a simple Eggotchi battery door fix pays better than rushing a handheld you cannot legally open yet.
Meeting the cast without spoiling endings
Opening-week dialogue introduces Yui, Hashimoto, Baketsu, and other neighbors who react to how fast you return devices. You are not locked into a personality type, but the game tracks whether you discount struggling customers or push rush fees. Those flags matter later for Characters routes and Achievements tied to endings.
For now, prioritize clear communication prompts when they appear—they often unlock bonus reputation that makes day-three jobs easier to price.
Day 2–3: Phones, toys, and the Nony tease
By the second in-game day you should see parody-brand hardware alongside Atari:
- Pokia 3310-style candy-bar phones with keypad or display faults.
- Eggotchi virtual pets with battery corrosion or cracked shells.
- A Nony PMP story hook where the customer admits buying on a gray-market listing and mentions official service licenses.
Treat the Nony job as foreshadowing. You may diagnose it in the demo, but full repair often waits until you purchase the Nony service license from the shop progression tree—see Licenses for costs and timing. Do not feel failed if the game gates reassembly; that is intentional pacing.
Workshop habits to build early
These habits save hours in Early Game and Shop Growth:
- One active story job plus one flip keeps cash flowing without cluttering the bench.
- Label mentally which devices need licenses (Nony PMP, Palaloid cameras, some Unicorp units) using the Device Difficulty list.
- Upgrade once, then bank—your first tool unlock from Tools should be something you use every job (ratchet driver, better lamp), not a niche sandblaster.
- Read the request text on online orders; courier damage keywords predict hidden housing cracks.
When to leave the first-days chapter
Move on when you have:
- Completed the CX40 storyline beat and at least two optional customer jobs.
- Opened the parts browser without tutorial arrows.
- Seen the license prompt for advanced handhelds or cameras.
- Earned enough to consider your first Workshop Upgrade—usually better lighting or storage.
At that point the training wheels are off. Continue to Early Game for online requests, marketplace buys, and choosing which Devices categories to specialize in.
Common first-days mistakes
Buying every spare listed for a job you have not diagnosed wastes early yen. Skipping cleaning steps causes fail states on corrosion-sensitive boards. Accepting a Nony PMP or Palaloid job before checking license requirements forces awkward cancellations. Finally, ignoring story customers to grind random flips delays tool discounts tied to reputation—balance both.
Frequently Asked Questions
Quick answers for ReStory players.
What is the first mandatory repair in ReStory?
Most saves start with an Atari CX40 joystick for a Pac-Man-playing regular using a licensed Atari 2600 setup. Exact dialogue varies slightly by build, but the CX40 tutorial is the core teaching job.
Can I fully repair the Nony PMP in the first days?
Usually not. The story introduces the handheld early to explain license gates. Expect to finish diagnosis, then unlock proper repairs after you buy the Nony service license later.
When should I first use the parts browser?
As soon as the tutorial sends you there—typically after your initial Atari job. Always match cart contents to diagnosed fault codes before paying.
Do early dialogue choices lock me out of endings?
No single day-one choice decides an ending. The game aggregates how you treat customers over many scenes. Save before major chapter transitions if you want to experiment.