ReStory: Chill Electronics Repairs How to Repair Devices in ReStory
Teardown, diagnose, fix, and rebuild without losing screws or story deadlines.
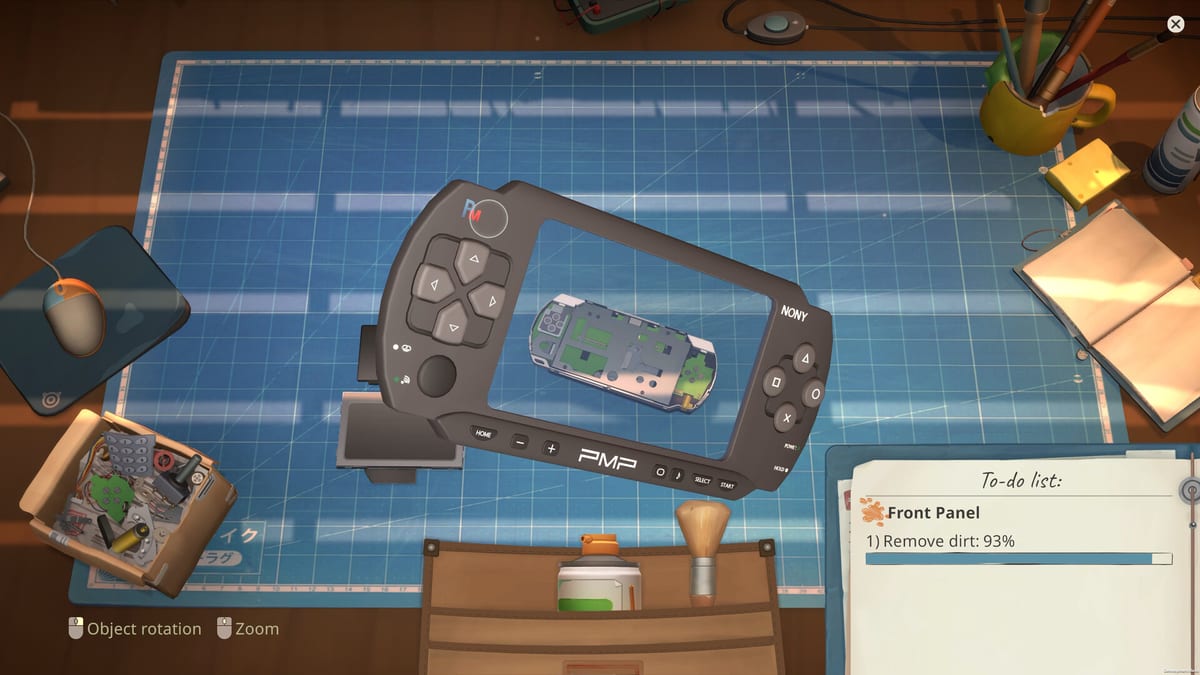
Every paycheck in ReStory: Chill Electronics Repairs flows through your bench. Whether a customer slides a scratched Pokia across the counter or Takashi delivers a licensed Atari console with a dead power rail, the repair pipeline follows the same disciplined stages. This guide breaks down each phase, common failure points, and upgrades that save real time across hundreds of screws.
The five-stage repair pipeline
ReStory models restoration more deeply than a single progress bar. Internalize this order:
- Disassembly — Remove screws, open shells, disconnect ribbon cables.
- Cleaning — Brush dust, dissolve residue, expose corrosion.
- Diagnosis — Identify failed parts or broken traces.
- Repair — Swap components and solder when needed.
- Reassembly — Reverse the teardown with screw accountability.
Skipping cleaning to rush a part swap often hides secondary faults. Skipping diagnosis wastes yen on parts that do not address the root issue.
Disassembly fundamentals
Screw counter discipline
The game tracks every fastener you remove. Treat the counter like a physical tray:
- Remove screws in a steady pattern—outer case first, internal brackets second.
- Do not mix screw lengths; mismatched fasteners strip threads on Nony PMP shells and thin phone frames.
- If the counter shows one screw unaccounted for, stop reassembly and search before powering on.
Cables and clips
Ribbon cables disconnect with gentle pulls aligned to the socket. Force angles that feel wrong— they usually are. Plastic clips on virtual pet housings and camera modules snap easily; wiggle parallel to the seam instead of prying outward.
Licensed console cases may use hidden screws under stickers or rubber feet. Rotate the device in inspection mode before assuming the shell is stuck.
Cleaning passes
Mid-2000s devices arrive with years of pocket lint, smoke film, and battery dust. Cleaning is not cosmetic—it reveals cracked traces and corroded contacts.
- Dry brushing removes loose debris from boards and heat sinks.
- Targeted solvent work lifts sticky residue around buttons and jack ports.
- Blow or wipe zones around speakers and fans prevent rework after reassembly.
A clean board makes soldering minigames easier because you can see which trace lifted. For tool unlock order including brushes, see Tools unlocks.
Diagnosis without guesswork
After cleaning, test obvious failure modes:
| Symptom | Likely fix |
|---|---|
| Shattered glass, lit backlight | Screen module swap |
| Dead power, clean contacts | Battery or charging port |
| Buttons register intermittently | Membrane or flex cable |
| Audio crackle | Speaker or headphone jack |
| No image, good power LED | Ribbon seating or GPU cap |
Some faults require a powered test mid-teardown. ReStory usually signals when safe power-on is allowed. If a part glows error color in inspection mode, trust the UI before buying random components from auction sites.
Part replacement vs salvage
You can install new parts from your Y2K browser or harvest donors from broken hardware. New parts cost more but reduce comeback jobs. Salvage saves yen early when spare parts cash is tight.
Broken components can be discarded after removal—there is no penalty for trashing a fried capacitor. Keep donor phones with good screens even if the board is dead; screens fund future Pokia jobs.
Soldering and trace repair
Later devices and story jobs introduce soldering iron work. Treat it as precision cleaning:
- Heat the pad, not the plastic.
- Align wire or replacement component before the joint cools.
- Finish with visual inspection; cold joints fail under vibration when customers drop phones again.
Soldering appears less often than screw swaps but gates progression on certain boards. If you dislike the minigame, upgrade input stability via Upgrade priority recommendations before practicing on high-value consoles.
Reassembly strategy
Reassembly punishes hurry more than teardown. Practical habits:
- Reinstall internal brackets before outer shells.
- Seat ribbon cables fully before screwing down pressure plates.
- Match screw lengths using memory of removal order; when unsure, try the shortest compatible fastener first.
- Use the in-game hint system if panels refuse to click—forcing creates invisible soft locks.
Electric screwdriver priority
Manual drivers work for tutorial phones. Once you juggle multiple jobs, the electric screwdriver is among the best upgrades in the game. It does not skip skill checks, but it removes friction from repeating dozens of fasteners on music players and handhelds. Buy it before cosmetic palettes unless a license deadline forces otherwise.
Device category notes
Consult the Devices catalog for deep lists; quick reminders:
- Flip phones (Pokia) — Hinge screws are easy to strip; support the lid while removing lower screws.
- Handhelds (Nony PMP) — Memory card slots trap dust; clean before blaming the main board.
- Licensed Atari consoles — Respect proprietary shell tabs; prying voids the aesthetic license fantasy.
- Virtual pets — Small screws disappear visually; rotate camera to floor-level angles.
- Cameras and music players — Lens and spindle areas need lint-free passes.
Integrating repairs with shop flow
Repairs do not happen in isolation. Before accepting a complex job, verify:
- Required license is active.
- Parts are in inventory or one auction bid away.
- You have bench time before a story return visit the same day.
Shop management covers scheduling. How to Play explains when to defer walk-ins for email batches.
Common mistakes
Accepting before inspecting — Intake dialogue sometimes hints at water damage. Ask follow-up questions via Dialogue choices when the UI allows.
Buying premium parts for flip jobs — Match part tier to payout; salvage is fine for low-margin practice hardware.
Ignoring privacy scenarios during test — Some phones contain story evidence. How you handle discovered data affects endings without changing the repair steps themselves.
Skipping controls practice — Controls lists zoom and rotate bindings that reduce mis-clicks on tiny screws.
Practice progression
Start with tutorial Pokia work in the First Days walkthrough. Chain two email jobs focusing only on cleaning speed. Take one salvage flip from auction. Then accept a licensed console job once your license tier allows.
Speed comes from repetition, not skipping steps. Players who respect the screw counter and cleaning pass finish more jobs per in-game week with fewer costly do-overs—leaving yen and energy for the branching stories waiting at the counter.
Frequently Asked Questions
Quick answers for ReStory players.
Why does ReStory track screws separately?
Missing fasteners block final assembly and can soft-lock testing. The counter enforces methodical teardown habits and prevents powering devices with loose internals.
When should I solder instead of swapping a whole board?
Use soldering when inspection highlights broken traces or pad damage but surrounding components test fine. Swapping entire boards is faster on severely corroded hardware.
Is the electric screwdriver worth buying early?
Yes for most players. It dramatically speeds reassembly on multi-screw devices like handhelds and consoles, increasing daily job throughput without lowering difficulty.
What if reassembly will not complete?
Check the screw counter, reseat ribbon cables, and use hints before forcing shells. One missing internal bracket often blocks outer panels from clicking shut.
Can I repair licensed devices without a license?
No. Story and UI gates require the proper license tier before certain Atari and specialty hardware can be opened legally in-game.